

TL;DR
Atlassian is shutting down OpsGenie on April 5, 2027, and will delete all unmigrated data after that date. You can export schedules, policies, and alert history via the REST API, but integrations and Slack configurations must be rebuilt manually. Spike is the best OpsGenie replacement because it mirrors OpsGenie’s on-call and alerting workflows. It starts at $7/user/month and offers 50% off for OpsGenie users for the first six months.
The OpsGenie shutdown: what you need to know
Atlassian stopped new OpsGenie sales on June 4, 2025. The full shutdown happens on April 5, 2027, at which point Atlassian deletes all data from accounts that have not completed migration.
| Date | What happens |
|---|---|
| June 4, 2025 | New sales stopped. No new purchases, trials, or plan changes |
| April 5, 2027 | Full shutdown. All access ends and Atlassian deletes unmigrated data |
The platform is now in maintenance-only mode, which means no new features, no new integrations, and limited bug fixes. You can still renew your current subscription until shutdown, but you cannot upgrade, downgrade, or change your plan.
For the full breakdown of the shutdown timeline and data loss risks, read our detailed OpsGenie shutdown guide.
What you can and cannot export from OpsGenie
Not everything in your OpsGenie setup can be moved. Before you start the migration, you need to understand what transfers cleanly and what has to be rebuilt from scratch.
What you can export
| Data | How to export |
|---|---|
| Escalation policies | OpsGenie REST API |
| On-call schedules | OpsGenie REST API |
| User lists | OpsGenie REST API |
| Alert history | REST API + built-in export settings |
| Team configurations | OpsGenie REST API |
| Routing rules | OpsGenie REST API |
What you cannot export
| Data | Why it doesn’t transfer |
|---|---|
| Integrations | Each integration uses API keys and webhook URLs tied to your OpsGenie account. Every integration must be manually reconfigured in your new platform |
| Slack configurations | The Slack app connection is specific to OpsGenie. You need to set up Slack integration from scratch in your new tool |
| Notification preferences | Individual user notification rules do not export. Each team member must reconfigure their personal alert preferences (phone, SMS, Slack, email, quiet hours) |
Start this process early. Exporting data under deadline pressure is how teams lose configurations they assumed were backed up.
Key point: On-call schedules, escalation policies, and alert history can be exported through the OpsGenie REST API. Integrations, Slack configurations, and notification preferences cannot be transferred and must be rebuilt manually.
How to prepare for the OpsGenie migration
Migration planning doesn’t need to be overwhelming, but it does need to start well before April 2027. Here is a practical breakdown of what to do and when.
Phase 1: Audit your current OpsGenie setup
Before you evaluate any replacement, document what you actually have in OpsGenie.
- List every integration and the monitoring tool it connects to. Note whether each one uses a webhook URL, API key, or email-based integration.
- Export your on-call schedules, escalation policies, and routing rules through the OpsGenie REST API.
- Document your team’s notification preferences. These are individual settings that cannot be exported, so each team member needs to record how they currently receive alerts (phone, SMS, Slack, email) and any quiet hours or mute settings they have configured.
- Export your alert history if you need it for compliance or post-incident analysis.
- Note any Slack or Microsoft Teams integrations and which channels they post to.
Most teams underestimate how much institutional knowledge lives inside their OpsGenie configuration. The escalation policy your team lead set up eighteen months ago, and the routing rule that sends database alerts to the DBA team at night. All of this needs to be documented before it disappears.
Phase 2: Pick your replacement
Evaluate alternatives based on your team’s actual workflow, not feature checklists. The key questions to ask:
- Do you need status pages? If yes, check whether they are included or cost extra. Some platforms charge $20-30/user/month more for status pages.
- Do managers need to control how each team member gets alerted? That’s team-level alert control, and not all platforms offer it.
- Are you Slack-first, or do your responders prefer phone calls and SMS?
- What monitoring tools do you use? Check that your replacement supports native integrations for all of them.
If you haven’t chosen a replacement yet, our OpsGenie alternatives blog post covers 7 paid platforms and 3 open source options with hands-on testing notes and pricing breakdowns for each.
Phase 3: Run the migration
The exact steps depend on which platform you choose, but the sequence is the same for any tool:
- Create your account, add teams, and configure basic settings.
- Reconnect your integrations by creating new webhook URLs or API keys for each monitoring tool.
- Rebuild your alert routing and escalation policies to match your existing OpsGenie configurations.
- Recreate your on-call schedules, shift handoffs, and notification preferences.
- Run both platforms in parallel for 1-2 weeks to catch any gaps.
- Cut over by disabling OpsGenie integrations and fully switching operations.
Key point: Before you migrate, audit every integration, export your schedules and policies via the REST API, and document each team member’s notification preferences. These are the three things teams most commonly lose during a rushed migration.
Why Spike is the best replacement for OpsGenie teams
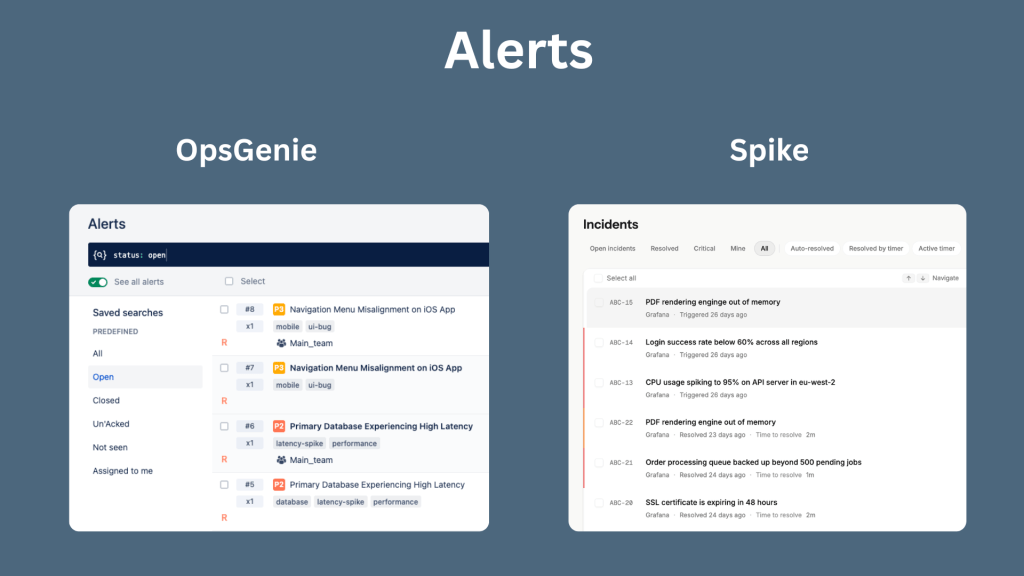
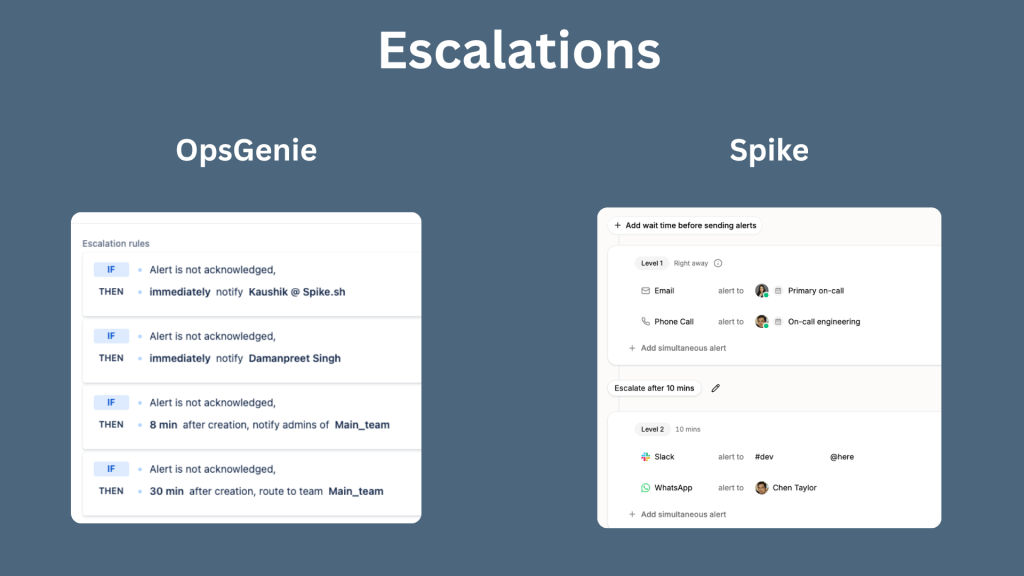
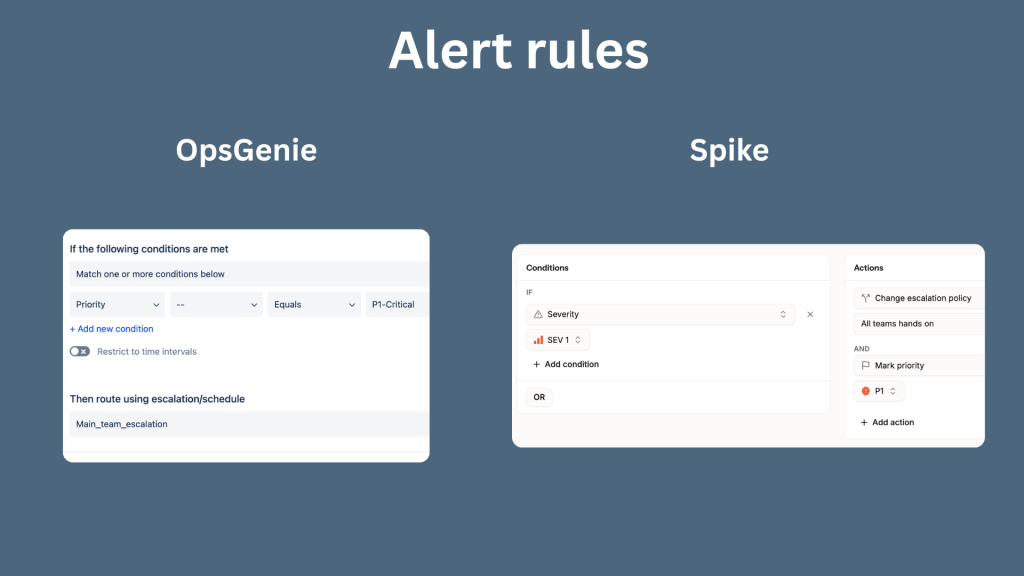
Spike is the best OpsGenie replacement for DevOps and SRE teams because it mirrors OpsGenie’s workflows without the complexity of Jira Service Management (JSM). Plus, Spike has a cleaner interface and is more affordable.
Spike mirrors OpsGenie across alerts, escalations, on-call, and alert rules
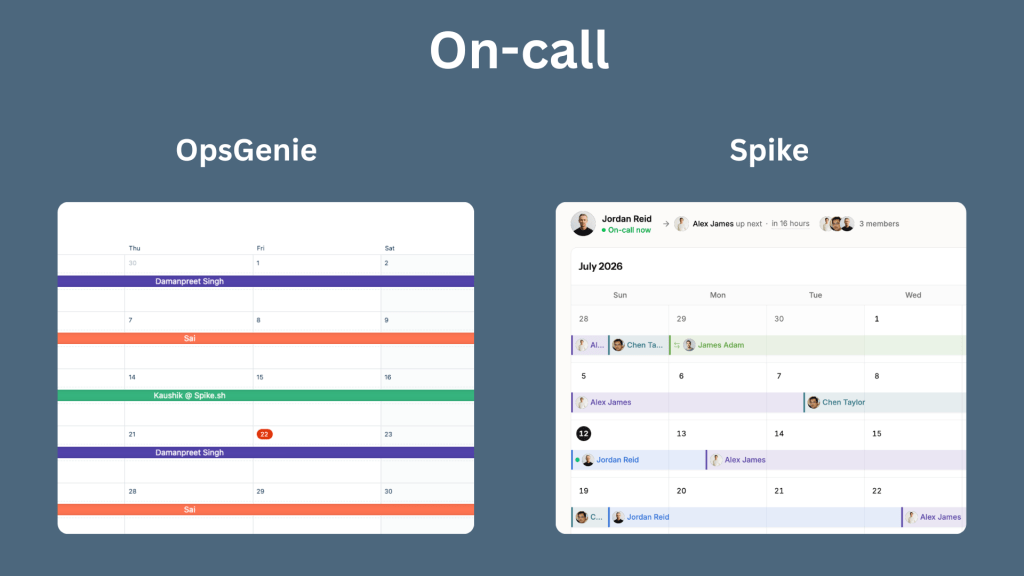
Where Spike goes beyond OpsGenie
A few things Spike does that OpsGenie does not:
- More alert channels: OpsGenie supports phone, SMS, email, Slack, and Microsoft Teams. Spike adds WhatsApp, Discord, and Pushover on top of all those channels.
- Email actions: You can acknowledge or resolve an incident by replying to the email alert with
#ackor#res. OpsGenie does not support email-based actions. - Built-in status pages on every plan: OpsGenie has no native status page. Teams had to rely on a separate tool like Statuspage.io. Spike includes public and private status pages with custom domain support on all plans.
- Out-of-office: Routes alerts to the next person in the escalation policy or a specific person automatically, without breaking the chain.
- Ready-to-use templates: Pre-built templates for escalation policies, on-call schedules, and alert rules make it faster to rebuild your OpsGenie setup in Spike.
And OpsGenie users get 50% off their first six months on Spike.
Key point: Spike is the best OpsGenie alternative for teams that want familiar on-call and alerting workflows. It starts at $7/user/month, includes built-in status pages on every plan, and gives OpsGenie teams 50% off their first six months.
How to migrate from OpsGenie to Spike
Moving from OpsGenie to Spike just takes under 2 hours of setup work. Here is the step-by-step process.
Step 1: Create your Spike account and invite your team (15 mins)
Sign up for spike and invite your team members. Spike’s setup asks for the basics: team name, members, and contact methods (phone, SMS, email, Slack). If your team already has an OpsGenie user list export, you can reference it to make sure nobody gets left out.
Once your team is added, set up your services. In Spike, a service maps to what OpsGenie calls an integration. If you had a “Datadog” integration in OpsGenie, create a “Datadog” service in Spike.
Step 2: Connect your monitoring tools and integrations (30 mins)
Every integration in OpsGenie uses a unique API key or webhook URL that does not transfer. Each one needs a new connection in Spike.
Go to Spike’s integrations and find your monitoring tools. For each tool:
- Create the integration in Spike to get a new webhook URL
- Go to your monitoring tool (Datadog, Grafana, AWS CloudWatch, Healthchecks.io, etc.) and replace the OpsGenie webhook URL with the Spike webhook URL
- While adding each integration, you can also configure a title remapper (to clean up alert titles), an acknowledge timeout, and repeat escalation settings
Step 3: Set up alert routing and escalation policies (30 mins)
This is where you rebuild your OpsGenie escalation and routing logic in Spike.
For escalation policies: Create your escalation steps, specify who gets alerted at each step, and choose how they get alerted (phone, SMS, Slack, email). This is one area where Spike gives you more control than OpsGenie. In OpsGenie, you can specify who gets notified at each step, but you can’t specify the channel. In Spike, each step can define both the person and the delivery method.
For alert rules: These are the Spike equivalent of OpsGenie’s alert policies. Set up your if-then conditions for routing alerts based on priority, time of day, or source integration. Spike includes ready-to-use templates that cover common patterns, so you don’t have to build every rule from scratch.
If you use Slack for alert notifications, connect Spike’s Slack integration and configure which channels receive alerts. Spike supports @here, @channel, and @user mentions natively in escalation steps.
Step 4: Recreate on-call schedules (30 mins)
Build your rotations in Spike’s on-call scheduler. Spike uses layers (similar to OpsGenie’s rotations), and you can choose from pre-built templates like daily 24/7, business hours, and non-business hours rotations.
As you configure each layer, a calendar preview updates in real time on the right side of the screen. This makes it easy to verify coverage before you save. You can view schedules in month, week, or list format.
Once schedules are live, have each team member configure their personal notification preferences through alert overrides. This is the part that can’t be exported from OpsGenie, so reference the notification documentation from your Phase 1 audit.
Set up on-call shift notifications for your Slack or Microsoft Teams channels so your team sees who’s on call without checking the dashboard.
Step 5: Run both platforms in parallel (1-2 weeks)
Point your monitoring tools at both OpsGenie and Spike for at least one week. During this overlap period, watch for:
- Alerts that fire in OpsGenie but not in Spike (missed integration or routing rule)
- Escalations that don’t follow the same path (misconfigured escalation policy)
- Team members who aren’t getting alerted on the right channel (missing notification preferences)
- Status page updates that should be automated via Playbooks
This parallel run is where you catch the configuration you missed in the first pass.
Step 6: Cut over and decommission OpsGenie (10 mins)
Once you’re confident the Spike setup is working correctly:
- Remove the OpsGenie webhook URLs from all your monitoring tools
- Disable your OpsGenie integrations
- Cancel your OpsGenie subscription (Atlassian will not automatically cancel it when you stop using the platform)
The whole process takes under 2 hours of hands-on work, plus the 1-2 week parallel run.
Tip: If you have a large number of escalation policies, on-call schedules, or alert rules to recreate, use Spike’s API to create them programmatically instead of rebuilding everything through the UI.
Spike’s support team has helped dozens of OpsGenie teams through this exact process. If you get stuck at any point, help is one message away.
FAQs
We have a large team with dozens of users. How do I invite them all to Spike without doing it one by one?
Spike’s API supports user management, so you can script bulk user invites using your OpsGenie user list export. This is significantly faster than inviting users individually through the UI for large teams.
We currently get alerted via OpsGenie’s mobile app. Does Spike have a mobile app?
Yes, Spike has a mobile app. It has iOS and Android apps with push notifications, and you can acknowledge, resolve, and escalate incidents directly from the mobile app.
What happens to our OpsGenie webhook URLs after the shutdown?
OpsGenie webhook URLs stop working on April 5, 2027. Any monitoring tool still pointing at one after that date will fire alerts into nothing. Update every webhook URL in every monitoring tool before you cut over.
What’s the first thing we should do in Spike after creating an account?
Connect your most critical monitoring tool first and trigger a test alert before touching anything else. This confirms the webhook is working and alerts are routing correctly before you rebuild escalation policies and schedules.
What if something breaks in our Spike setup after we’ve decommissioned OpsGenie?
Spike’s support team is reachable via chat and responds quickly. Also, this is exactly why the parallel run matters, you want to catch configuration issues while OpsGenie is still active and not after you’ve cut over. If you do hit an issue post-cutover, Spike’s support has helped dozens of OpsGenie teams through this transition and can troubleshoot quickly.