Get phone and SMS alerts fromExpel
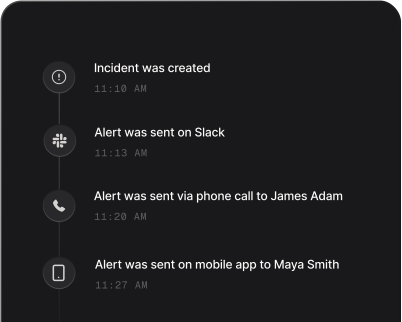
Expel's analysts watch the security tools you already run and raise an Expel alert, an investigation, an incident or a remediation action when something needs a human. Spike turns each of those Workbench notifications into an incident and pages whoever is on call — phone call, SMS, Slack or email — escalating until someone answers.
Set up with AI
I use Expel for monitoring and Spike for on-call and incident management. Walk me through connecting them: create a Expel integration in Spike, copy its webhook URL, and add that webhook to Expel alert settings. Then help me send a test alert to confirm incidents show up in Spike.
What is Expel MDR?
Expel is a managed detection and response (MDR) provider, and Expel Workbench is the console its service runs in. Expel brings no sensors of its own: it connects to the tools you already pay for — endpoint detection such as CrowdStrike, cloud and identity providers, email security, your SIEM and network kit — and its analysts triage what those tools produce around the clock. What reaches you has already been looked at by a human: an Expel alert for a detection worth your attention, an investigation when analysts dig into one, an incident when the activity is confirmed, and a remediation action when there is something for your team to do.
Workbench can notify by email and Slack, which is enough for weekday afternoon triage and no use at all for a credential-theft detection at three in the morning. Send the same notification to Spike and it becomes a page instead: Spike phones and texts the engineer who is on call, and if nobody acknowledges it, the escalation policy hands it to the next responder.
Spike keys the incident on the Expel object’s own id, so the stream of notifications Workbench produces about a single piece of activity stays together. An assignment, an analyst’s update, a downgrade or a reopen joins the incident that is already open instead of paging a second time, and the closing notification resolves it. Because an Expel alert and an investigation are different objects, they stay different incidents — which is why it pays to subscribe to one family of events at a time.
The incident takes its title from Expel’s own summary of what it found — “Suspicious PowerShell execution on WEB-PROD-03” — which is all a locked phone screen needs to show, and the detection name, the security vendor whose tool raised it, Expel’s severity and the organization it fired in travel with the incident. Alert routing rules read those fields, so a confirmed Expel incident can wake the security on-call while a low-severity Expel alert waits for the morning.
How to set up Expel alerts
A Spike integration is a unique webhook URL. Add it as a webhook destination in Expel Workbench, point notifications at it, and Expel's findings start paging.
Step 1: Create an Expel integration in Spike
In your Spike dashboard, open Integrations and choose Expel. Spike generates a unique webhook URL for this integration — copy it, and attach the integration to the service and escalation policy that should answer what Expel finds.
Step 2: Add a webhook destination in Expel Workbench
In Expel Workbench, go to Settings → Organization Settings, open the Integrations tab and choose Add a webhook destination. Name it and paste the Spike URL. Workbench has no "no auth" option, so pick Bearer Token and type any value — the token in the URL is the credential and Spike ignores the header.
Step 3: Point a Workbench notification at the destination
A destination receives nothing until a notification sends to it. On the Notifications tab choose Add Notification, set the conditions — the object and what happened to it, "Expel alert is created", say — and pick your webhook destination under Notify via. Workbench's Test connection carries no event name, so Spike treats it as real and opens an incident: run the test before a live escalation policy is attached, or expect one incident to resolve afterwards.
Step 4: Keep to one family of Expel events
Choose those conditions deliberately: an Expel alert and the investigation Expel opens from it are two objects with two ids, so subscribing to both families pages twice for one piece of activity. The Expel alert events give you everything Expel's analysts raise, the investigation and incident events only what they have confirmed. Start with one family and widen once you have seen the volume.
Step 5: Add the closing event for that family
Add the "closed" notification for whichever objects you subscribed to. Spike matches an Expel notification on the object's own id, so the close lands on the incident its creation opened and resolves it rather than paging again. Remediation actions have no closing event — those incidents close on the integration's resolve timer or by hand.
That's it — Expel alerts now page whoever is on call.