
Welcome to Spike!
Whether you’ve just set up your account or joined an existing team, this guide will help you understand how to receive and respond to incidents.
Getting Incident Alerts
Spike alerts you across multiple channels, so you never miss a critical incident.
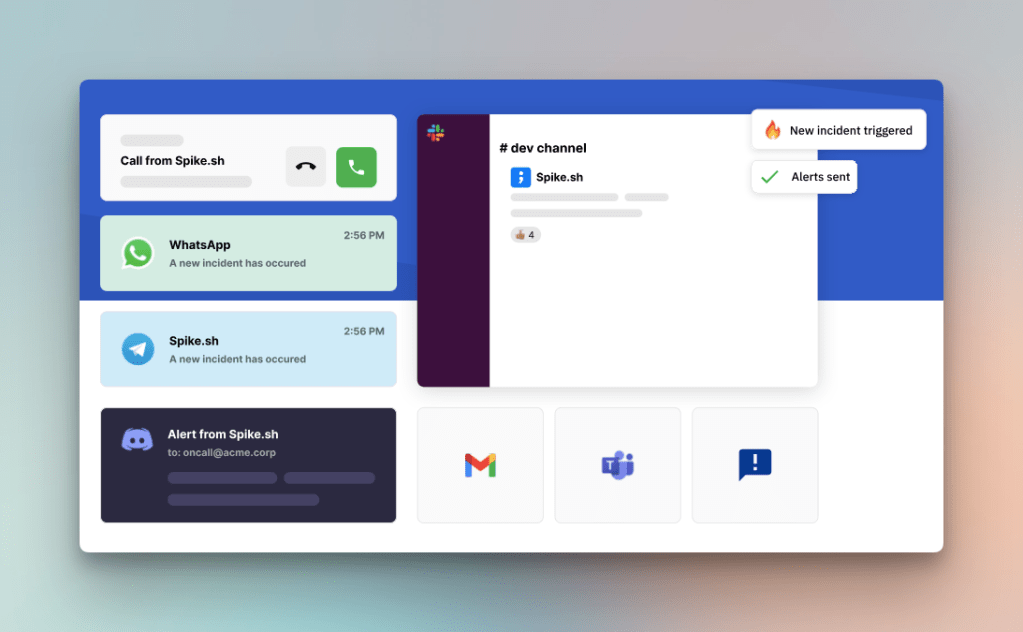
Primary Alert Channels:
- Phone Call: Direct voice call for immediate attention
- SMS: Text message with incident details
- Email: Full incident information in your inbox
- Slack: Interactive alerts in your workspace with action buttons
- Microsoft Teams: Alerts with one-click actions directly in Teams
Additional Channels:
Spike also supports Telegram and WhatsApp alerts, giving you flexibility to receive alerts on your preferred platform.
To receive alerts on different channels, follow these guides
- How to get phone call alerts from Spike
- How to get SMS alerts from Spike
- How to get email alerts from Spike
- How to get Slack alerts from Spike
- How to get Microsoft Teams alerts from Spike
- How to get Telegram alerts from Spike
- How to get WhatsApp alerts from Spike
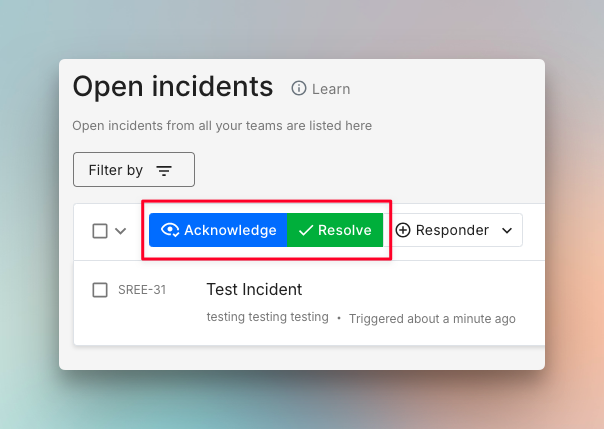
First Actions
Now that you know how to receive alerts, let’s look at what actions you can take when an incident triggers.
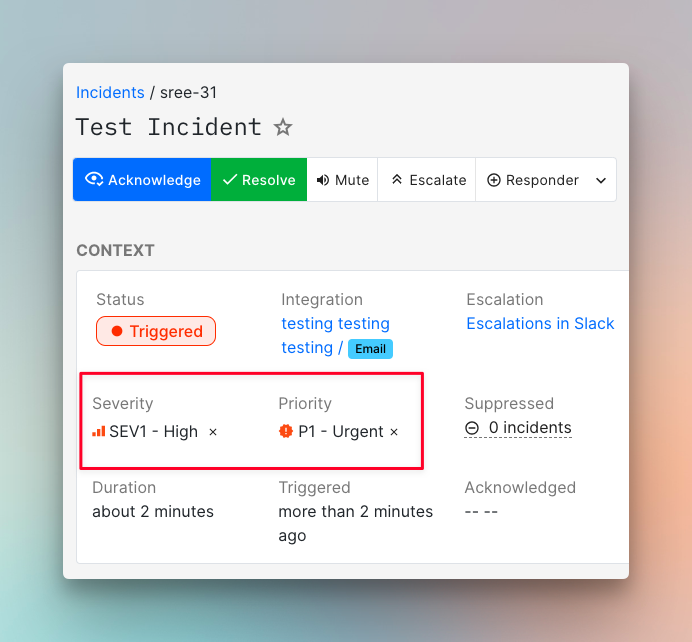
You have two primary actions:
- Acknowledge: When you acknowledge, Spike pauses alerts and escalations, signaling that someone is handling the issue. This prevents duplicate efforts and reduces alert noise.
- Resolve: When you resolve an incident, Spike stops all alerts and marks the issue as handled. If the same problem occurs again later, Spike will create a new incident with new alerts.
How to Take Action on Different Alert Channels
- Phone Call: Press 4 to Acknowledge, 6 to Resolve
- SMS: Reply with
ack <incident id>to Acknowledge,res <incident id>to Resolve - Email: Reply with
#ackto Acknowledge,#resto Resolve - Slack/MS Teams: Click the interactive buttons in the alert message
- WhatsApp/Telegram: Click the interactive buttons in the alert message
- Dashboard: Click the status buttons on the incident page
More Actions
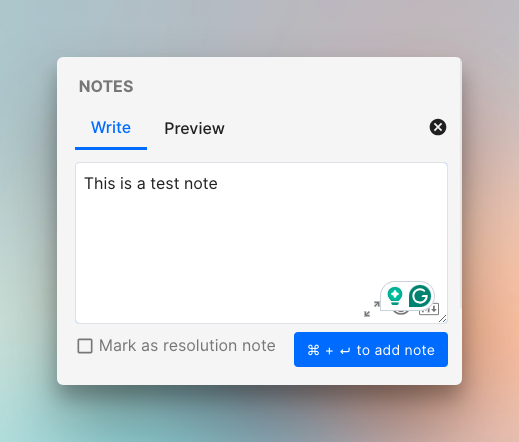
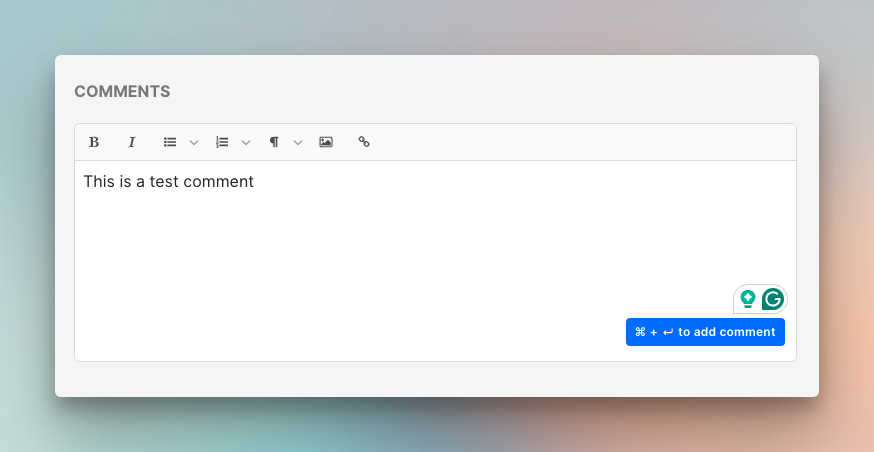
Once you’ve acknowledged an incident, these additional actions can help you better manage the incident:
- Adding Notes and Comments
Document what you tried, what worked, and any important observations as you investigate. This creates a timestamped record that’s invaluable during post-incident reviews and helps teammates quickly get up to speed if they need to take over.
2. Setting Priority and Severity
Use Priority (P1-P5) for urgency and Severity (SEV1-SEV5) for impact. Spike automatically reads these from incoming payloads, or you can set them manually from the dashboard. For more control, use Alert Rules to automatically assign priority, severity, and route alerts based on conditions.
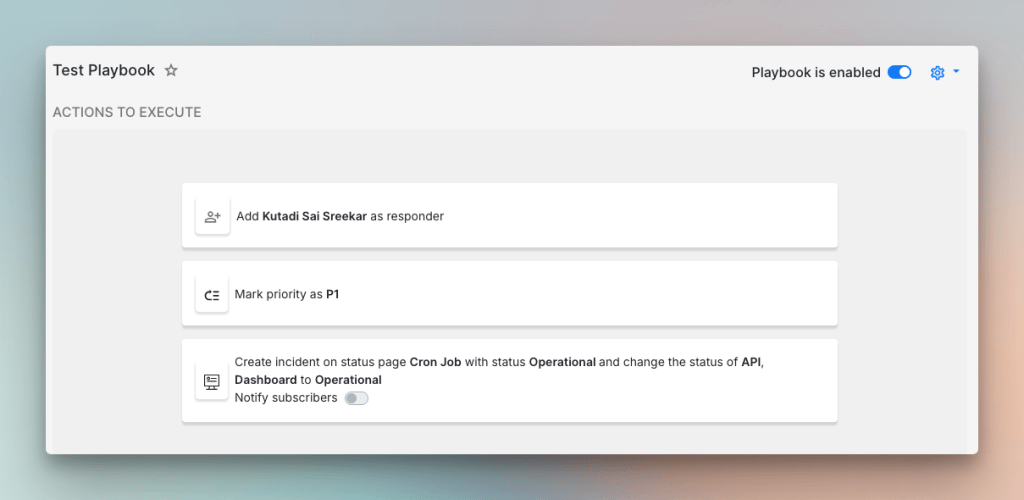
3. Automate Response Workflow
Trigger Playbooks to execute predefined actions, create tickets in Linear or Jira, and sync with helpdesk platforms like Freshdesk or Zendesk. This eliminates repetitive tasks and integrates incident response directly into your existing workflow.
Escalation Policy
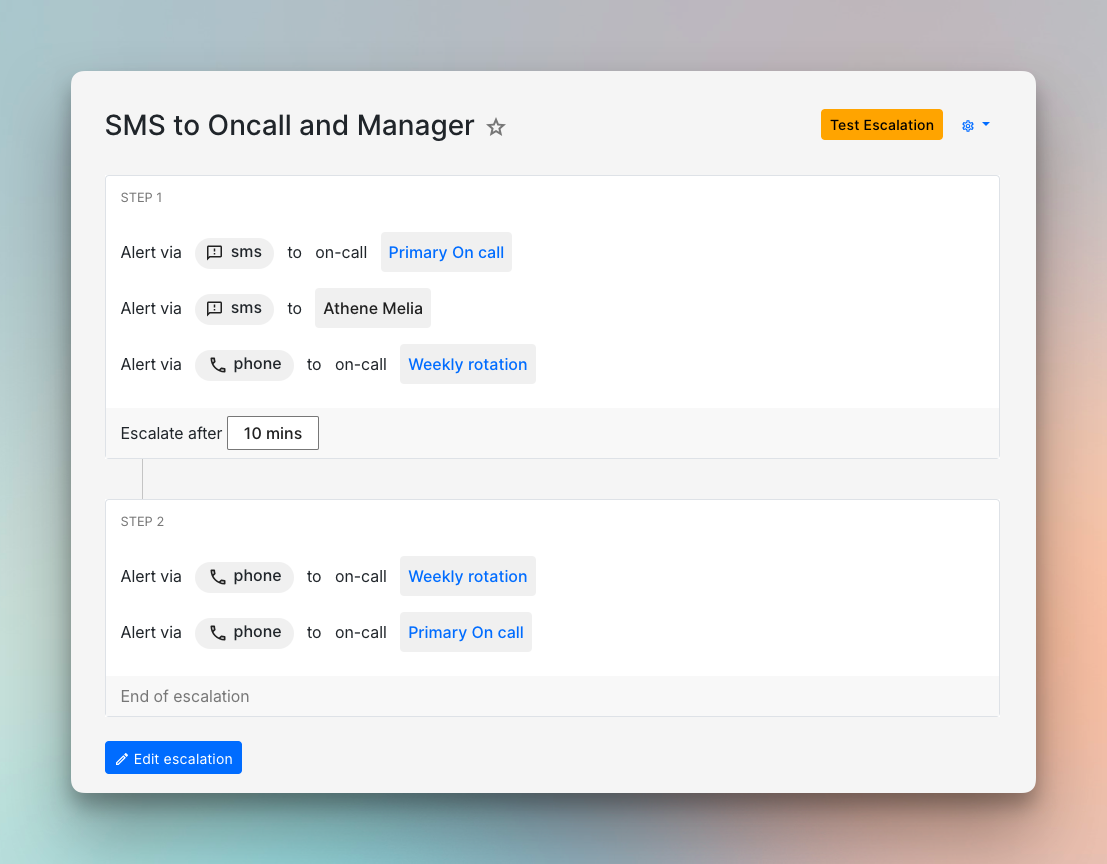
Every alert for a new incident is sent through an Escalation Policy, a multi-step plan for alerting the right people.
If you don’t acknowledge an alert within the set delay time, Spike automatically proceeds to the next step in the escalation policy.
This makes sure critical incidents never slip through the cracks, even when you’re in a meeting, away from your desk, or simply miss the initial alert.
How Escalation Works
Escalation policies define the sequence of people who should be alerted about an incident. For example:
- Alert Person A immediately
- If not acknowledged in 5 minutes, alert Person B
- If still not acknowledged in 5 more minutes, alert Person C
This layered approach balances rapid response with reasonable time for the primary responder to react.
Spike provides ready-to-use escalation policy templates to get you started.
Learn more about escalation policies →
On-Call Schedules
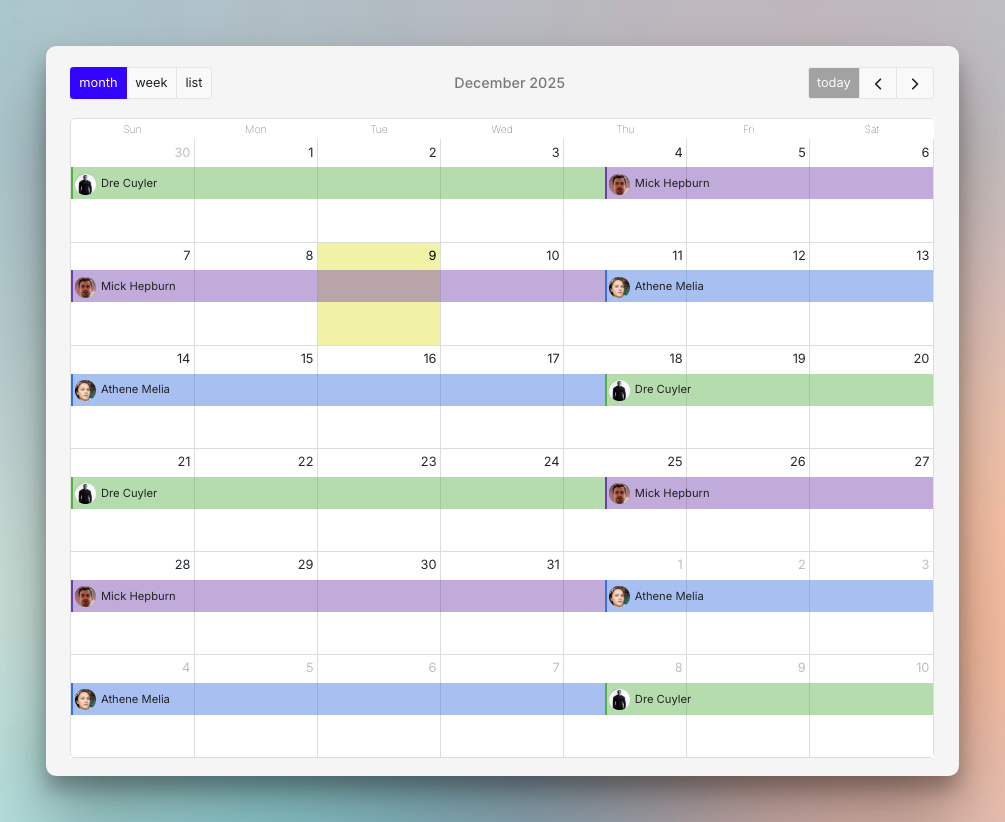
If you don’t want to be the only one who receives all alerts, you can set up on-call schedules to rotate who gets these alerts.
On-call schedules make sure someone is always available to respond, while the rest of the team can have uninterrupted work or downtime.
Common Schedule Types:
- Weekly Rotation: One person is on-call for a full week. Best for small teams with low alert volumes.
- Daily Rotation: A different person is on-call each day. Better for teams with high alert volumes.
- Follow-the-Sun: For globally distributed teams. Shifts rotate across time zones.
Spike provides ready-to-use on-call templates to get you started.
Learn more about On-Call Schedules →
Smart Alert Routing
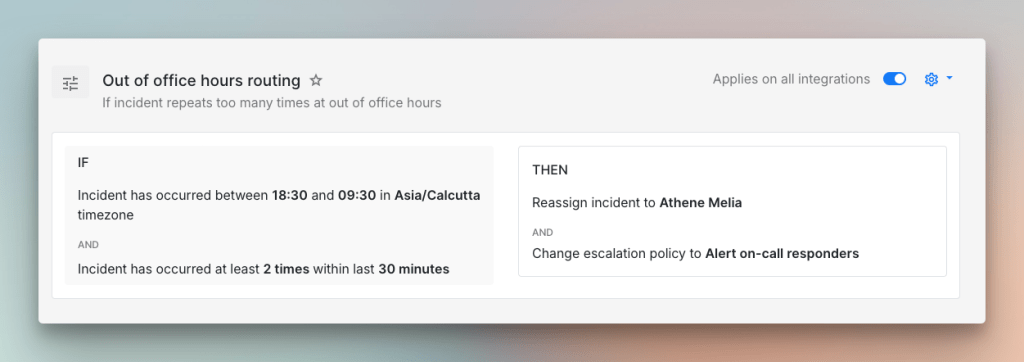
From day one, you can optimize how alerts reach your team. You can use Spike’s Alert Rules to route alerts based on severity, priority, and time of day.
For example, you can:
- Route critical (SEV1) incidents to a phone call immediately
- Send low-priority (P3) alerts to Slack
- Configure a Slack notification during the day, but a phone call alert if the same issue happens at midnight
These keep you responsive to critical issues while protecting your team’s work-life balance.
Spike provides ready-to-use Alert Rule templates to get you started.
Learn more about Alert Rules →
What’s Next
Spike offers additional features like Status Pages for stakeholder communication, War Rooms for team collaboration, and more.