Atlassian is shutting down OpsGenie. New sales stopped on June 4, 2025. Complete shutdown happens on April 5, 2027.
Atlassian wants you to migrate to Jira Service Management (JSM). But like many OpsGenie users, you probably have questions.
What is JSM? How does it handle alerting, escalation policies, and on-call schedules? What automation options does it have? Is it the right fit? And more.
This blog breaks down everything you need to know. You’ll learn about JSM’s features, setup process, and limitations. Plus, I’ll introduce you to a better option if JSM doesn’t click.
Let’s get started!
What is Jira Service Management (JSM)?
Jira Service Management is Atlassian’s IT service management platform built on top of Jira.
It helps teams manage service requests, incidents, problems, and changes in one place. The platform brings IT, DevOps, and business teams together.
For OpsGenie users, JSM will feel familiar. Alert routing, on-call schedules, and escalation policies work similarly to what you already know.
However, JSM goes beyond incident management. It includes ITSM capabilities like asset tracking, change management, and service catalogs.
Key Features of Jira Service Management (JSM)
JSM offers several features to help teams manage incidents. Let’s look at the core ones.
1. Alerting
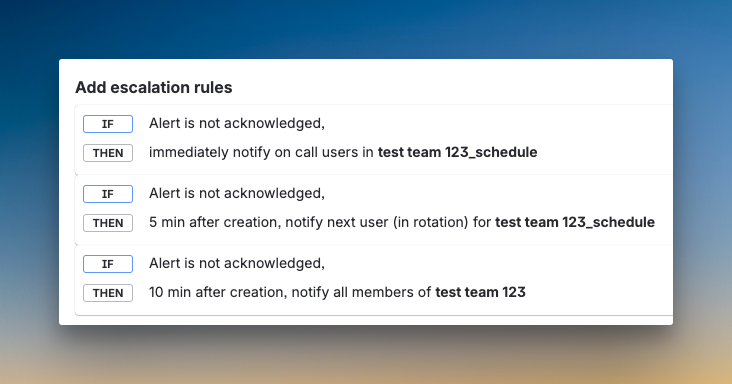
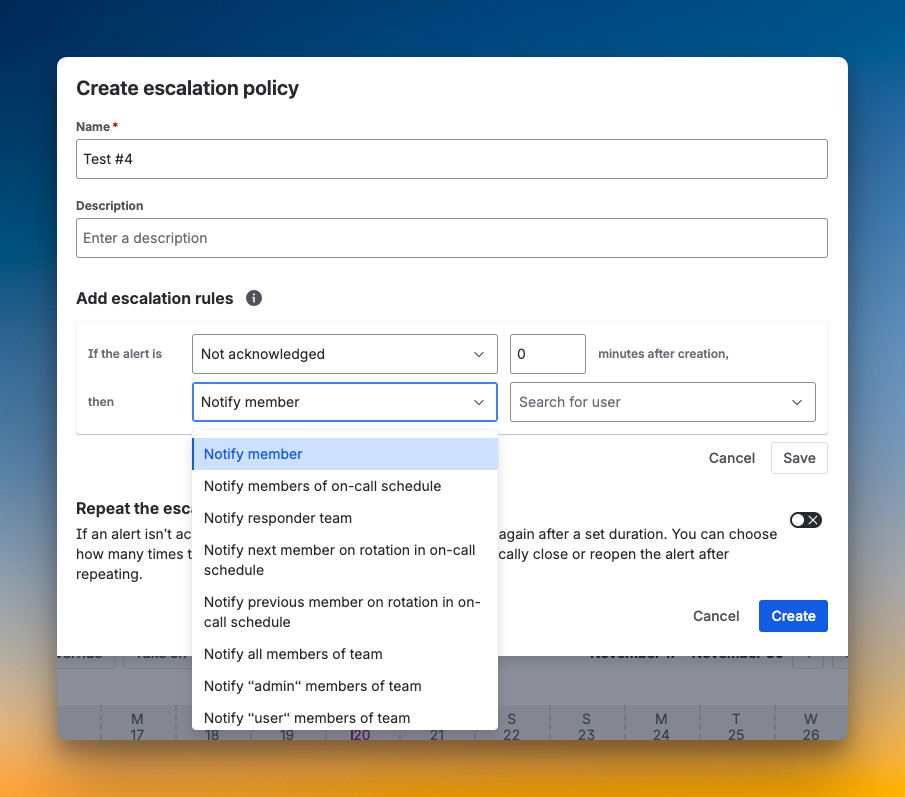
JSM sends alerts through phone calls, SMS, email, Slack, and push notifications. You can build escalation policies that define who gets notified and when. Each escalation step lets you choose responders like on-call users, team members, or even the next person in rotation.
The platform adds repeat escalation with customization options. You can set a time delay between repeats, limit maximum repetitions, and close alerts automatically when repeats finish. JSM also lets you route alerts to the next member on rotation, the previous member, or a random team member.
Alert Policies help with automatic triage. You can update priority based on conditions you define. However, the delay time in escalation policies is calculated from the top of the policy, not relative to each step. This means you need to calculate cumulative time rather than setting “escalate after X minutes” for each step.
To learn more, read the blog: JSM Review for Alerting
2. Incident Response
JSM carries forward OpsGenie’s manual triage approach. You can update priority from Slack or the dashboard. For automatic triage, Alert Policies and Automation work like if-else-then rules. You can acknowledge alerts from all channels except email.
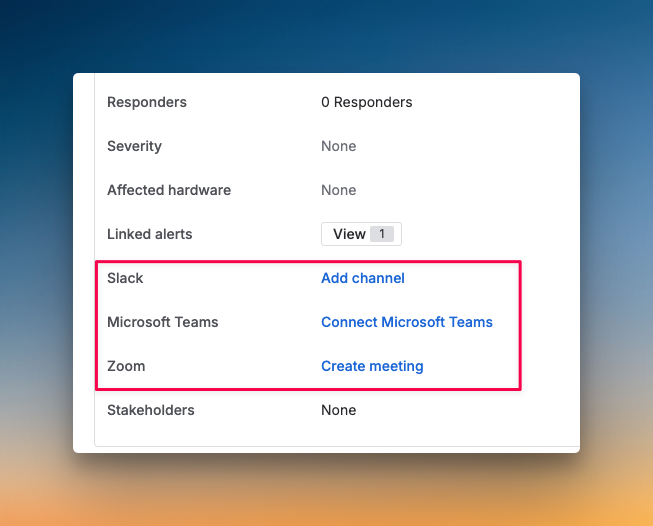
JSM offers instant war room buttons for Zoom and Teams on the incident dashboard. You can create dedicated Slack channels manually or set up automation to create them when alerts become incidents.
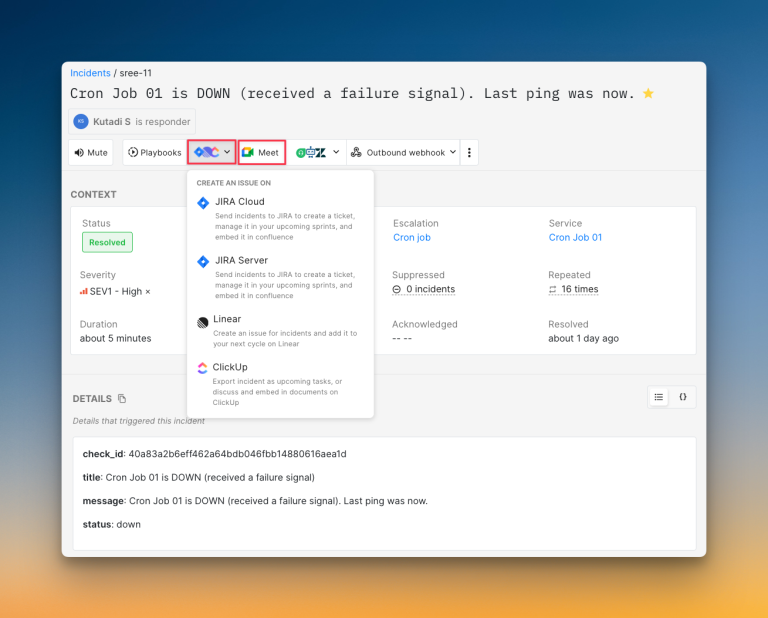
The platform keeps OpsGenie’s strong bi-directional sync with Jira. You can create tickets instantly from the dashboard or automate ticket creation when alerts match specific criteria.
To learn more, read the blog: JSM Review for Incident Response
3. On-Call Management
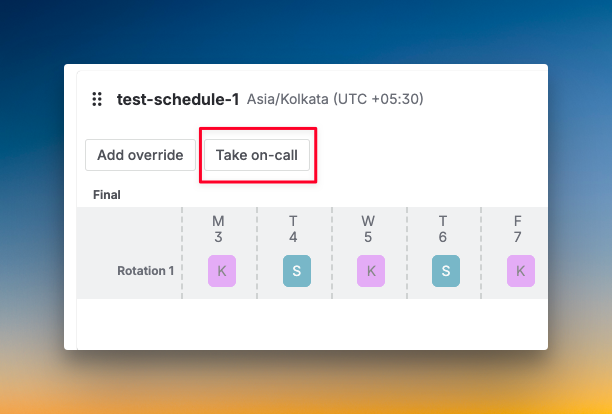
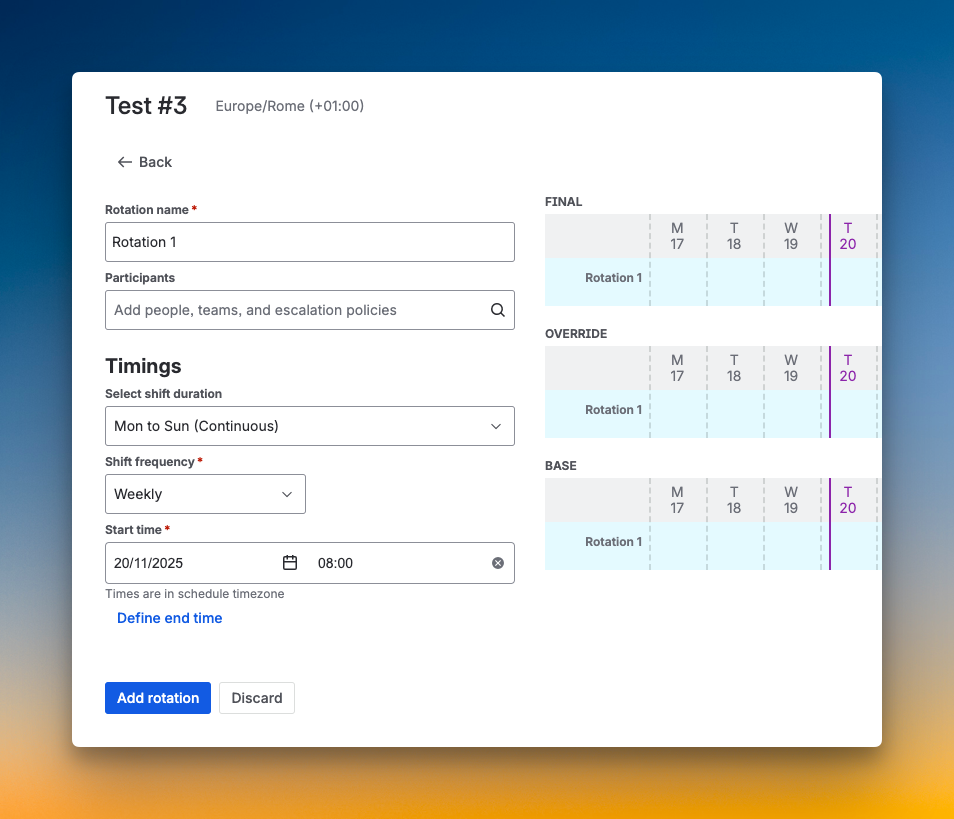
JSM follows team-based on-call schedules like OpsGenie. You create schedules with rotations that can be daily, weekly, or custom. The platform automatically routes alerts to whoever is on duty.
You can add multiple layers to schedules for backup coverage. Overrides are simple with direct calendar interaction or an “Add override” button. JSM also adds a “Take on-call” button that overrides all rotations and makes you the only on-call responder for one hour.
However, on-call handoff notifications go to individual team members, not team channels. There’s no activity log for schedule changes, and you can’t add comments to overrides for context.
To learn more, read the blog: JSM Review for On-Call Management
4. Automation
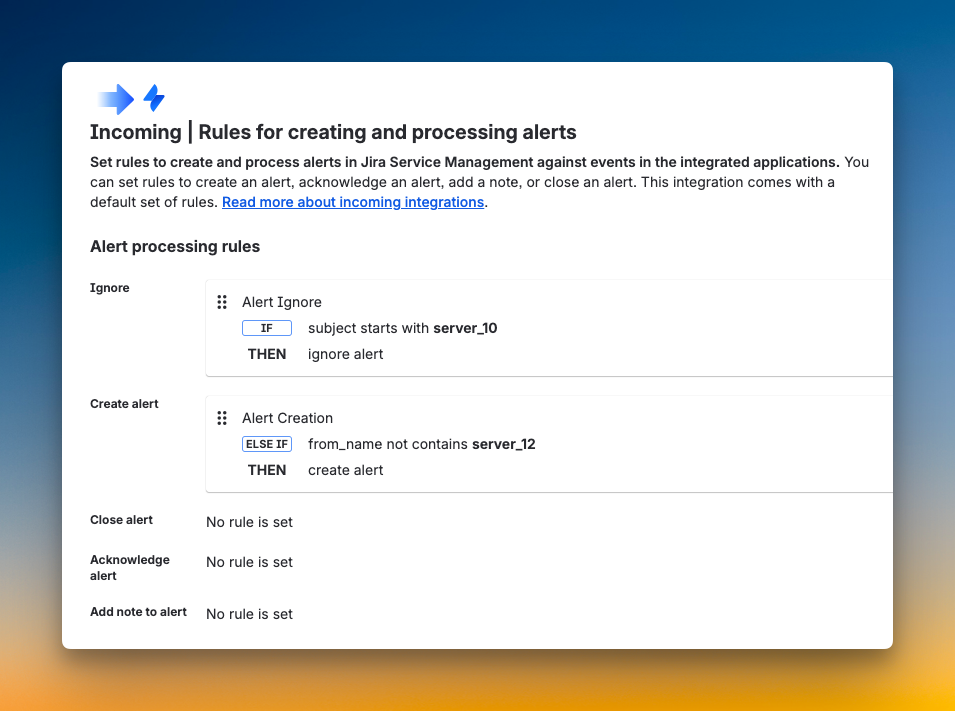
JSM offers multiple automation options, like OpsGenie. You can set up Alert Policies with if-else-then rules to filter alerts, modify priority, or add tags automatically. Also, while setting up integrations, you can create Alert Processing Rules to define when alerts get created, closed, acknowledged, or ignored.
With the Automation feature, you can define triggers like alert created or status changed, add conditions with smart values, and set actions like creating incidents, sending emails, or running scripts. Advanced options include time delays and parallel branches.
However, direct automation for status page updates is not available. You need to trigger webhooks to update status pages when incidents occur or are resolved. Webhook triggers and automatic alert deduplication through Alias configuration are both possible.
Benefits of Jira Service Management (JSM)
JSM offers several benefits for teams handling incidents. Here are a few:
- Familiar for OpsGenie users: JSM carries forward many OpsGenie features like alert routing, escalation policies, and on-call schedules.
- Jira integration: If your team already uses Jira, JSM connects directly. You can create tickets, track incidents, and link to existing projects without switching tools.
- ITSM capabilities: Beyond incident management, JSM offers asset tracking, change management, and service catalogs. This makes it a comprehensive tool.
- Automation options: You can automate routine tasks like ticket creation, notifications, and field updates. This saves time during incidents.
- Free tier available: JSM offers a free plan for up to 3 agents. Small teams can test the platform before committing.
Getting Started With Jira Service Management (JSM)
Setting up JSM involves three main steps. Here’s how to start:
Step 1: Create Your First Service Project
Services in JSM represent the systems or applications you want to monitor.
To create your first service project:
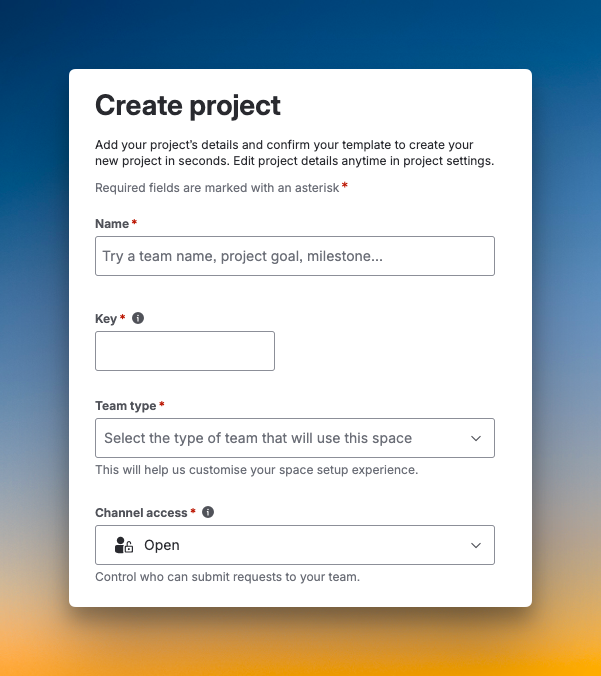
- Click the “Create” button from the top navigation bar
- Choose a project template (IT Service Desk, Basic Service Desk, or Customer Service Desk)
- Give your project a clear name
- The project key will be created automatically
You can customize the project name, URL, avatar, and description later in project settings.
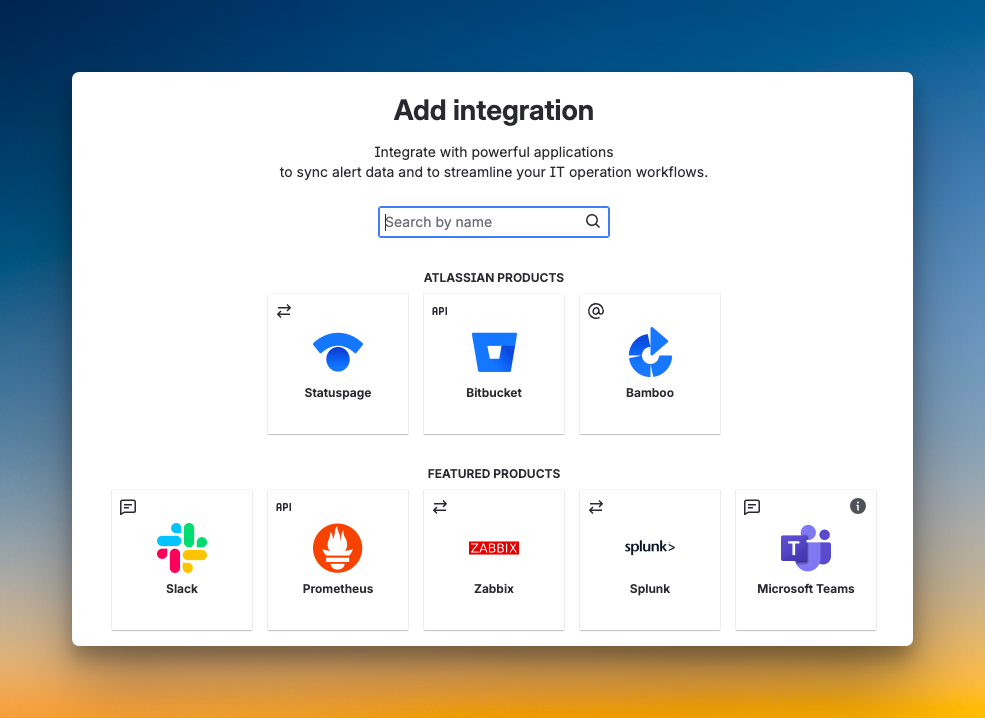
Step 2: Connect Your Monitoring Tools
Next, connect JSM to the tools that monitor your systems.
To add integrations:
- Go to the Alerts section in your JSM project
- Click “Add integration” and choose your monitoring tool
- Copy the integration key or webhook URL
- Add this key to your monitoring tool’s configuration
- Send a test alert to confirm it works
This creates a connection that opens incidents when problems occur and closes them when issues are fixed.
Step 3: Set Up On-Call Schedules and Escalation Policies
On-call schedules and escalation policies decide who gets notified when incidents happen.
To create an on-call schedule:
- Navigate to the On-Call section
- Click “Create schedule”
- Name your schedule and set the time zone
- Add team members and define rotation patterns (weekly, daily, custom)
- Set handoff times and save
To create an escalation policy:
- Go to Escalation Policies
- Click “Create escalation policy”
- Name it clearly (like “Backend Team Escalation”)
- Add your primary responders from schedules or individuals
- Set delay time before escalating (15 minutes is common)
- Add backup responders as additional escalation steps
With these three steps complete, JSM is ready to handle incidents for your team.
Spike: A Better Alternative to Jira Service Management (JSM)
Spike is an incident response platform focused on simplicity and speed. With over 15 million incidents processed and 750,000+ alerts delivered, it works well for teams of all sizes.
Here’s why Spike stands out as a better alternative to JSM:
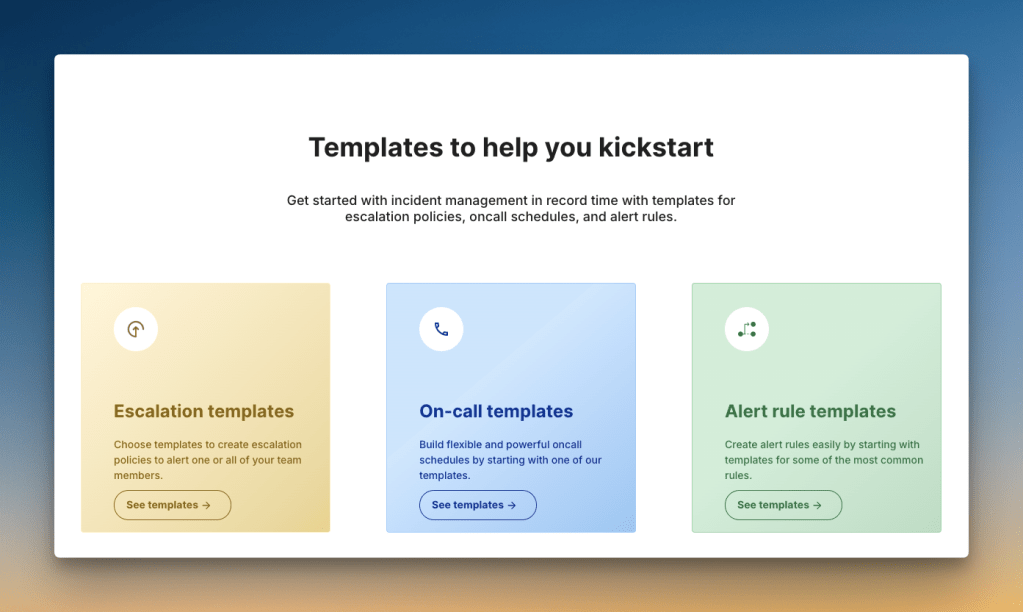
- Quick setup: JSM needs extensive configuration. Spike gets you started in under 5 minutes. You get ready-to-use templates for schedules, escalations, and alert rules.
- Simple user experience: Spike combines an easy-to-use design with powerful controls. One-click actions let teams acknowledge alerts, update status pages, or join war rooms without extra steps.
- Affordable pricing: Spike starts at $7/user/month with all core features included. JSM starts at $20/user/month, but key features cost extra.
Teams can save up to 73% by choosing Spike over JSM. Learn more →
- Built-in status pages: Spike includes status pages at no extra cost in all plans. JSM requires a separate Statuspage.io subscription. This adds $29-109 per month to your bill.
Check out these example status pages of Spike: AirBnB and SpaceX.
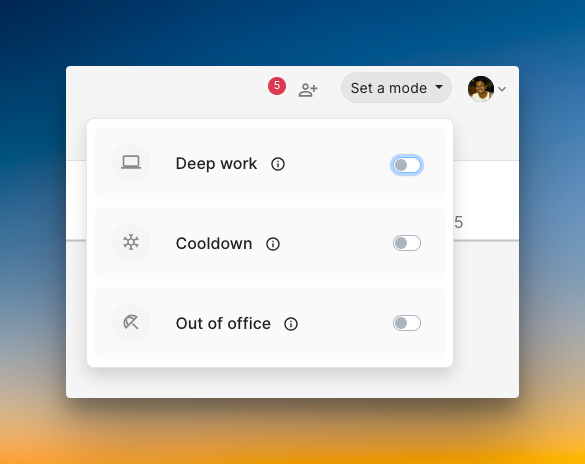
- Team wellbeing: Spike protects work-life balance with cooldown mode, deep work settings, out-of-office options, and alert suppression. These features come standard, not as paid add-ons.
To learn more, read the blog: JSM vs. Spike: Incident Management
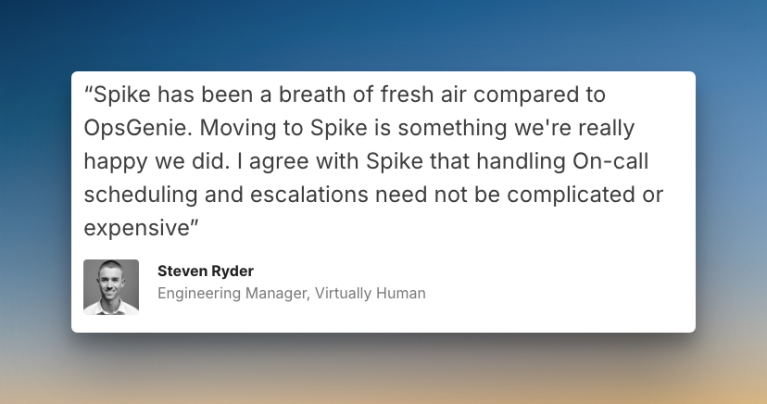
Hear what Steven Ryder, former Engineering Manager at Virtually Human, says about Spike:
With OpsGenie shutting down, businesses are switching to Spike with 50% off. Learn more →
FAQs
What is the difference between Jira and Jira Service Management?
Jira is a project tracking tool for software development teams. Jira Service Management is built on top of Jira and adds IT service management capabilities like incident response, on-call schedules, and service desk features.
What is the purpose of Jira Service Management?
JSM helps teams manage service requests, incidents, problems, and changes. It brings IT, DevOps, and business teams together on one platform to improve collaboration and reduce downtime.
Is Jira Service Management a ticketing system?
Yes, JSM includes ticketing capabilities as part of its broader ITSM features. However, it’s more than just a ticketing system. It also offers incident management, on-call scheduling, asset tracking, and change management.
What happens to my OpsGenie data when it shuts down?
Atlassian provides migration tools to move your OpsGenie data to JSM. You should start the migration process well before the April 5, 2027, shutdown date to avoid data loss.
How much does Jira Service Management cost?
JSM offers a free plan for up to 3 agents. The Standard plan costs $20/user/month. The Premium plan costs $51.42/user/month. Enterprise pricing requires contacting sales. Note that status pages cost extra ($29-109/month via Statuspage.io).
What are JSM alternatives?
Several strong alternatives to JSM exist: Spike, PagerDuty, Incident.io, Squadcast, and Zenduty. Each tool offers different strengths. Spike stands out for its simplicity, speed, and all-inclusive pricing.